Friday 28 December 2012

Blueberry crumble muffins

Muffins are one of my favourite bakes because they are just so easy to make. I was at the supermarket the other day and saw the blueberries and I just had to buy them. These muffins really still stays yummy after storing for a few days. It is best if you can just pop into the microwave an warm it up a bit and it still taste great!


Recipe from Bake or Break

Ingredients

For the crumb

3/4 cup all-purpose flour
2 tablespoons light brown sugar
2 tablespoons granulated sugar
4 tablespoons unsalted butter, melted
1/4 teaspoon vanilla extract
pinch of salt

For the muffin

2 & 1/4 cups all-purpose flour
2 teaspoons baking powder
1 teaspoon baking soda
pinch of salt
2 large eggs
1/2 cup buttermilk
1/2 cup firmly packed light brown sugar
1/2 cup granulated sugar
1 teaspoon vanilla extract
1/2 teaspoon lemon zest (optional)
1/2 cup unsalted butter, melted (I substituted with canola oil)
3/4 to 1 cup blueberries (I used fresh blueberries)


Directions


Preheat oven to 400°(200 Deg C).

Using a fork, mix all crumb ingredients together until well-combined. Set aside. 

Whisk together flour, baking powder, baking soda, and salt in a medium-sized bowl. Set aside. 

In a large bowl, lightly beat eggs. Stir in buttermilk. Add both sugars and mix until combined. Stir in vanilla and lemon zest. Stir in canola oil. 

Add flour mixture in 2-3 portions. Mix until there are still streaks of flour remaining. Stir in blueberries, mixing just until combined. 

Scoop the batter into each cup about 2/3 full. This should fill each cup almost to the top. Sprinkle tops of each muffin with crumb mixture. 

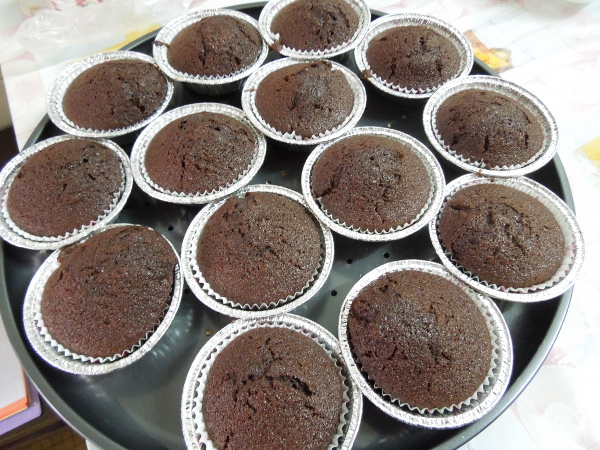
Bake for 14-16 minutes, or until a pick inserted into the center comes out with moist crumbs. Cool in pan on wire rack.

Note : For crisper edges, grease a standard muffin pan. For softer edges, use liners in each cup instead. 

You can add more blueberries if you like. 
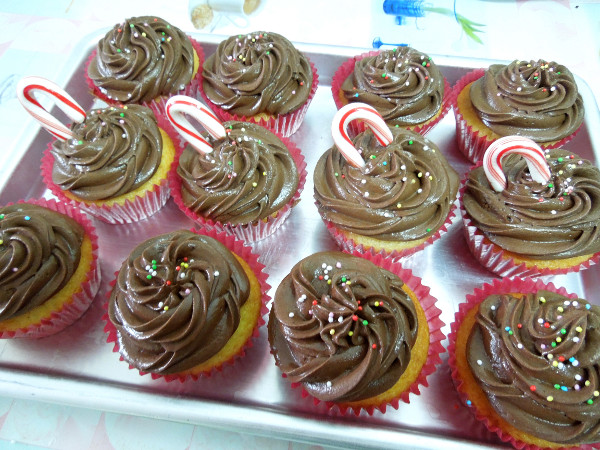
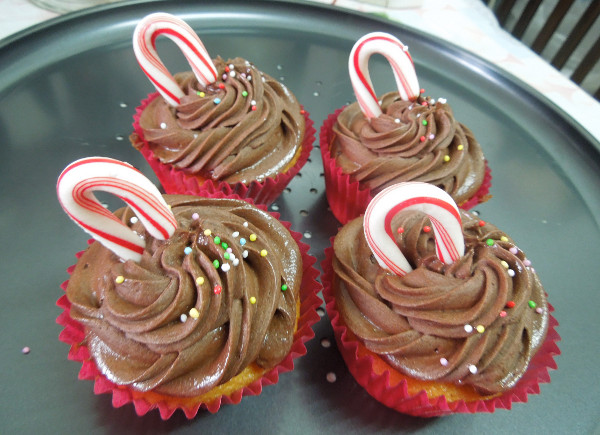
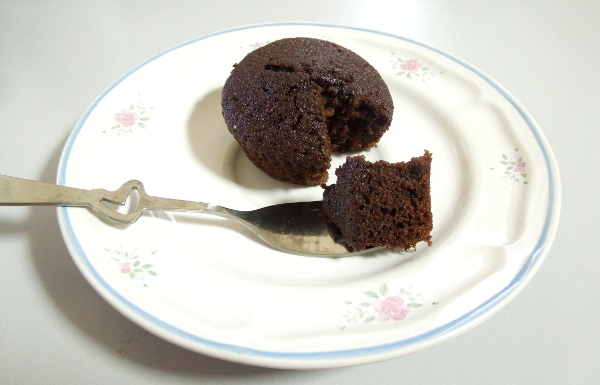


Pretty isn't it? 

Have a great weekend ahead everyone!
 

Wednesday 26 December 2012

Vanilla cupcake with chocolate cream cheese frosting

I posted an entry of the red velvet cupcakes that I made recently and they all look so cute and adorable. So now I am quite into cupcakes.

And this time, I made vanilla cupcakes with Chocolate creamcheese frosting for a Christmas lunch gathering at my friend's place.

It was a great Christmas day celebration with great company and good food.


Merry Merry Christmas!!


For the cupcake

Ingredients

1 1/4 cups cake flour
1 1/4 teaspoons baking powder
1/2 teaspoon baking soda
1/2 teaspoon salt
2 eggs
3/4 cup sugar
1 1/2 teaspoons pure vanilla extract
1/2 cup oil (vegetable, canola or extra light olive oil)
1/2 cup buttermilk *

* If you can't find buttermilk, you can also use the following substitute
- 1/2 cup milk plus 1/2 teaspoon white vinegar or lemon juice - set aside for 5 minutes before using
- 1/2 cup yogurt

Directions

* Preheat oven to 350*F (180 Deg C)

* In a medium bowl, add cake flour, baking powder, baking soda and salt.  Stir together with whisk, and set aside.

* In the bowl of an electric mixer, add eggs and beat 10-20 seconds.  Add sugar and continue to beat on medium speed about 30 seconds.  Add vanilla and oil, beat.

* Reduce mixer speed to low and slowly add about half of the flour mixture.  Add half of the milk, then the rest of the flour and the rest of the milk.  Beat until just combined.  Scrap down the side of the bowl.

* The batter will be thin.   Pour batter into a muffin pan prepared with paper liners.  Fill liners about 2/3 full.

* Bake cupcakes in pre-heated oven for 12-14 minutes.

* Cool in pan 1-2 minutes, then remove cupcakes from pan (carefully) and finish cooling on a wire rack.

* Frost as desired when fully cool.


For the frosting

Ingredients

½ cup (1 stick/8 Tablespoons) butter (set at room temp about 10 minutes, but should still be cool)
8 oz. cream cheese (directly from fridge)
1/2 cup unsweetened cocoa
1 teaspoon vanilla extract (always use pure vanilla extract if possible)
4 cups powdered confectioners sugar
1 to 4 Tablespoons heavy cream, heavy whipping cream

Direction

* Place butter in a large mixing bowl and blend slightly. Add cream cheese and blend until combined, about 30 seconds.

* Add cocoa powder and blend until combined.

* Add vanilla extract and powdered sugar and blend on low speed until combined. Increase to medium speed and beat until it begins to get fluffy.

* Slowly add the heavy cream, a little bit at a time until desired consistency is met. (Don’t add too much if you want the frosting to stay in place when piped on cupcakes.)

* Beat until fluffy, about 1 minute.

*Use at once or keep refrigerated. (This frosting will keep well in the refrigerator for several days, but you may need to re-beat it for the best texture.)

Happy Holidays everyone!

Monday 10 December 2012

Red velvet cupcake with cream cheese frosting

I have always been wanting to try to make a red velvet cake but didn't really go about looking for a recipe from the internet. And recently I found a recipe from Glorious Treats and decided to give it a try because the pictures is just too adorable. This cake is good for occasions like Valentine's Day or Christmas because of the colour.


For the cupcake


Ingredients

2 1/4 cups cake flour
1/3 cup unsweetened cocoa (Dutch process)
1  tsp salt
1 1/3 cups oil (Canola oil or any cooking oil)
1 1/2 cups sugar
2 eggs
4 tbsp liquid red food coloring (or 1 tablespoons concentrated food coloring)
1 tsp vanilla
3/4 cup buttermilk
1 1/2 tsp baking soda
2 tsp white vinegar

Directions

1. Preheat oven to 350*F (180 Deg C).  

2. In a large bowl whisk cake flour, cocoa and salt, and set aside.

3. Whisk or beat oil and sugar until well blended. Add eggs one at a time, and continue beating.  

4. Add food coloring and vanilla and mix well.

5.  Add flour and buttermilk alternately, in two batches. Mix just enough to combine. 

*I am not able to get any buttermilk from the Cold Storage near my house, so I used yogurt as substitute which I just so happens to have a tub which I bought to go with my cereals. To use yogurt, it will be 1-to-1 ratio, which means 1 cup of buttermilk equals to 1 cup yogurt. There are other substitutes if you do not have yogurt. You can also use 1 cup of milk plus 1 tbsp of vinegar or lemon juice.

6.  Place baking soda in a bowl or cup, add vinegar and stir (it will foam and expand).  Add to cake batter and beat for 10 seconds.

7. Fill cupcake liners 2/3-3/4 full. Bake cupcakes 20-24 minutes.

For the cream cheese frosting


Ingredients

½ cup (1 stick/8 Tablespoons) butter (set at room temp about 10 minutes, but should still be cool)
8 oz. cream cheese (directly from fridge)
1 tsp vanilla extract
2 cups powdered confectioners sugar
1 to 2 tbsp heavy cream, heavy whipping cream

Directions

1.  Place butter in a large mixing bowl and beat until smooth. Add cream cheese and blend until fully combined

2.  Add vanilla extract and powdered sugar while mixing.  Increase to medium speed and beat until it begins to get fluffy. For the powdered sugar, though I it says 2 cups, it really depends on personal preference. I do not like my frosting to be too sweet, so actually I have only used less than 2 cups of powdered sugar.

3.  Slowly add the heavy cream, add abit at a time until desired consistency is met. (Don’t add too much if you want the frosting to stay in place when piped on cupcakes.) Beat until fluffy and you can start frosting your cupcakes!

They looks cute right :D Looking at them makes me smile!

 
 My cake looks darker then the usual bright red velvet cake. This is because this recipe used a slightly more amount for cocoa powder. If you want, you can reduce the amount of cocoa powder so it doesn't look more like maroon colour.

Monday 3 December 2012

Chewy Chocolate Chip Cookies

I have looking around for a good recipe for chewy chocolate chips cookies and I think I have found the one! I have always preferred my cookies to have the soft and chewy texture as compared to those cakey ones and I have tried a few recipes and it just turns out too cakey. The previous recipe I tried before all calls for light brown sugar. But this recipe is using dark brown sugar, which makes the cookies moist. Can you see the moisture in the cookies? And the melted chocolate chips oozing out. Heavenly.


Ingredients

2 3/4 cup flour
1 tsp salt
1 tsp baking soda
1 tsp baking powder
2 1/2 stick butter
1 3/4 cup Dark brown sugar
1/4 cup granulated sugar
2 Eggs
2 tsp vanilla extract
2 cup chocolate chips

Instructions
 
1. Mix the flour, salt, baking soda and baking powder. Set aside.
 
2. Cream butter and sugars on medium speed until fluffy. Beat in the eggs one at a time then add vanilla. Reduce the mixer speed to low and mix in the flour mixture until combined. Stir in the chocolate chips by hand.
 
3. Cover with plastic wrap and set in the fridge for at least an hour, but overnight is best.
 
 
4. Preheat oven to 375 deg F (190 Deg C) and line cookie sheets with a baking mat. I used a ice cream scoop to measure out the batter and left them as balls.
 
They indeed looked like ice creams!
 
 
5. Bake for 10 - 14 minutes depending on your oven until the edges are golden and the middles are still soft. 
 
6. Let cookies cool on the cookie sheet for 8 minutes and then transfer to a cooling rack.

Enjoy!

Sunday 25 November 2012

A staycation surprise at Marina Bay Sands

I booked a room for a 2D1N stay at MBS for my Fiance's birthday. Overall, it was a very nice and relaxing experience. Both of us really enjoyed ourselves.

It was a surprise for him, so he didn't know about all these things at all.

 Baked a Chocolate buttermilk cake for his birthday.

The room is pretty spacious. Our room is with the Garden View. Their in-room mini bar will automatically be charged once you remove any items out from the fridge. I bought a bottle of Mascato with me and I needed the fridge. So I called the operator and in the end, they delivered an additional portable cooler to my room. :D


My favorite is the bathroom. It was so spacious! They have the bathtub and a separate walk-in shower. Love it to the max!

And finally he came at night! Whole day of preparation just for my love!

Happy Birthday! 
As it was quite late already and tired to go out for dinner, we ordered room service instead. So we went ahead with the cake first! Too hungry already... Haha!

We didn't order alot of food. And we did the right thing because the portion was big. We went up to the Skypark after our dinner to have a walk. Very windy and it was about to rain, So we didn't stay too long as well.

The view when we wake up in the morning.

We went for a morning walk at Gardens by the Bay before we go back to the hotel to prepare for check-out. 

Doing what he does best. Trying to be funny all the time.


It was nice to have a short staycation once in a while. Really feels so relax and recharged!

Chocolate Buttermilk Cake

I woke up early in the morning to bake a birthday cake for my Fiance. However, this time round my cake turned out with big cracks. I think my oven was too hot. I got to say, the looks of the cake doesn't do the cake justice because even thought the cake looks ugly, it was still indeed a very yummy cake.

This is by far the best chocolate cake recipe I ever tried. The cake was very moist and the taste of chocolate is very rich. And because chopped chocolates was added to the batter, you can taste the melted chocolate from every bite. Yummylicious~


Recipe

Got this recipe from The Little Teochew. Here & here.

1 cup (4oz/114g) cake flour (plain flour is fine too)
1/2 cup (1.6oz/46g) Dutch-processed (alkalized) cocoa powder
1 tsp baking powder
1/4 tsp salt
3/4 cup (1 1/2 sticks/6oz/170g) unsalted butter, softened
1 1/4 cups (8.8oz/250g) granulated sugar
2 large eggs
3/4 cup (180ml) buttermilk*
2 tablespoons (30ml) Kahlua or substitute with 1 tbsp on rum (optional)**
1 tsp vanilla extract
4 ounces (113g) finely chopped bittersweet chocolate
or 3/4 cup miniature semisweet chocolate morsels bittersweet

* If you do not have buttermilk, pour 180ml of whole milk in a cup, squeeze in the juice of half a lemon, stir and let it sit for 5mins. You can alternatively use about 1 tbsp of white vinegar in place of lemon juice.


** I didn't use any Kahlua or rum and it still taste fine.

1. Position a rack in the center of the oven and preheat the oven to 175°C (350°F). Generously grease the interior of a 6-cake Bundt-lette pan (it's best to use shortening here). Dust the molds with flour and tap out the excess.

*Because I do not have a 6-cake Bundt-lette pan, I used a 7 inch cake pan instead.

2. In a medium bowl, sift together the flour, cocoa powder, baking powder, and salt. Whisk to combine and set aside.

3. In the bowl of an electric mixer, using the paddle attachment, beat the butter at medium speed for 2 minutes, until very creamy. Gradually beat in the sugar. Increase the speed to medium-high and beat for 3 minutes, until the mixture is well blended and light. At medium speed, beat in the eggs one at a time, mixing well after each addition and scraping down the sides of the bowl as necessary.

4. In a small bowl, stir together the buttermilk, Kahlua (or rum), and vanilla extract. If your mixer has a splatter shield attachment, attach it now. At low speed, add the dry ingredients to the butter mixture in three additions, alternating it with the buttermilk cream mixture in two additions, and mixing just until blended. Remove the bowl from the mixer stand and stir in the finely chopped chocolate or miniature semisweet morsels. Scrape the batter into the prepared cake molds, dividing it evenly and smoothing the tops.


5. Bake the cakes for 25 to 30 minutes, until a cake tester inserted into the center of a cake comes out clean. Cool the cakes in the pan set on a wire rack for 10 minutes. 


If you also using a 7-inch cake pan like me, you can try following Miss Teochew instruction. 
Baked at 175°C for the first 30 minutes. After that, lower the temperature to 160°C for the next 40 minutes. Test with a skewer at round the 1 hour-mark. You should also tent your cake throughout the entire baking time to prevent having a burnt top. 

This is the the second time I baked this cake and the cake crack more seriously than my first attempt. I didn''t tent my cake this time round, so this is also maybe why my cake have bigger cracks though the top are not burnt

* During my first attempt, I did tent my cake, but end up the foil got sticked to the cake. Not nice. So if you want to tent your cake, you may want to ensure that your batter is not too full.

6. Invert the cakes onto the rack and cool completely.

* If you intend to chill the cake(s), make sure they are stored in a tightly-lidded container to prevent drying out.


Look at the cracks.. Its like earthquake!
 

Tuesday 20 November 2012

Organise your measuring cups and spoons


This is quite a creative way to organise your measuring cups and spoons isn't it? Would love to do something like that for our future home.

Monday 19 November 2012

Simple Things You Can Do to Brighten Your Spouse’s Day


Found this while browsing through Pinterest. Realising that simple things and actions can mean a lot for your spouse. This is something that we should always keep in mind and not take them for granted.

Start telling your significant other how much they meant to you and appreciate them! :D

  • Encourage your spouse when they take on something new.
  • You can brighten their day by telling them how great they look in an outfit,
  • Compliment them for one of their personality traits,
  • Thank them for something they've done.
  • Let your spouse know by a phone or text message if you're going to be late
  • Send your spouse a message just to say 'I love you and I'm thinking of you.'
  • Plan a surprise with them in mind. It doesn't have to be anything big, just something you know they will like.
  • Put a love note where you know your spouse will find it.
  • Help them with a chore at home.
  • Praise your spouse when you are talking about them to others.
  • Tell them how glad you are you married them and some of the reason why you are glad.
  • Plan a date night doing some of their favorite things.
  • Stop and give you spouse a kiss or cuddle on your way though a room.
  • Cook their favourite meal for no other reason than because you want to please them
  • Send them an email telling them how much you love them.
  • Buy them a special surprise gift.
  • Spoil them by making a cake or a special favourite desert.

The most important thing is to let them know by your words and actions how much you love them and could not imagine life without them.

Sunday 18 November 2012

Buttermilk Chocolate Cupcakes

I baked a buttermilk chocolate cake two weeks ago and I have some leftover buttermilk and kept them in the freezer. I usually do not want to keep leftovers for too long, so I will always search on the internet for recipes. Today, I am making some buttermilk chocolate cupcakes. I love baking cupcakes and muffins because they are just so easy to make. Preparation time is short and you just mix all ingredients together. Its great for parties!


There is no frosting for the cupcakes because of the lazy bug in me. Still, eating the cupcake alone is good enough as the sweetness is just nice. Usually I find that frosting are a little too sweet for me though cupcakes are suppose to look pretty and cute. :D


I like having cupcakes warm so what I will do is that I will simple pop them in the microwave for a minute or two. The fragrance and taste of the chocolate is richer when its warm. This is also one of the reason I prefer not to use frosting. 

The recipe

1/2 cup butter, softened

1-1/2 cups sugar
2 eggs
1 teaspoon vanilla extract
1-1/2 cups all-purpose flour
1/2 cup baking cocoa
1 teaspoon baking soda
1/4 teaspoon salt
1/2 cup buttermilk
1/2 cup water


In a large bowl, cream butter and sugar until light and fluffy. Add eggs, one at a time, beating well after each addition. Beat in vanilla. Combine the flour, cocoa, baking soda and salt. Combine buttermilk and water. Add dry ingredients to creamed mixture alternately with buttermilk and water, beating well after each addition.

During the whole mixing process, I just used the whisk and spatula. This is to avoid over beating or else your cupcakes will come out too tough.

Photobucket


Fill paper-lined muffin cups two-thirds full. Bake at 375F for 15-20 minutes or until a toothpick inserted near the center comes out clean. Cool for 10 minutes before removing from pans to wire racks to cool completely.


MMmmm~~ I just love the scent of freshly baked cakes. They smell heavenly.


Philips Viva Collection Hand blender


I went to the Philips Carnival yesterday and bought this new toy for $80. I am a happy girl now. One more new toy to play with. With these, I can whipped eggs white with ease, making soups and easier food preparation. I can't wait to try it out. Time to do some cooking soon!

These are the highlights of the product.

A smooth result in seconds
  • Powerful 650 Watt motor
  • 16 speed settings for optimal performance
  • Extra powerful turbo button for the toughest ingredients
  • Double action blade
Easy processing and storing
  • Protection cap to protect blending knife when stored
  • 1.7L oval beaker for preparing food or storing the appliance
  • XL chopper accessory for chopping large quantities
  • Whisk accessory for whipping cream and mayonnaise
  • Soft touch grip and buttons
No splashing while you blend
  • Anti-splash blade guard
Quick and easy cleaning
  • Detachable stainless steel shaft

Friday 16 November 2012

The first blog post!

Well, this is not really my very first blog post as I used to blog on Livejournal during my schooling days. Gosh, I can’t even remember that was how many years ago! Since I haven’t been blogging for a few years now, I am feeling a little bit 'rusty' right now as I do not know where to start.

It was just this morning that I suddenly feel like starting to blog again. So here I am, writing my first post again! It took me some time to figure out how the website works (pardon my slowness), cracked my head thinking of a name for my blog, playing around with the templates and etc.

Just getting the hang of it!

So, eventually I settled on ‘My Simple Little Joys’ as my blog title. Finding joy from all the simple and little things or events that happens around me. I find my joys from doing things that I love. I love doing craft works, baking, travelling and taking photographs. Finding joy from being with people I love. Joy from the support and encouragement I get from friends and of course, the person I love most, my fiancĂ©. We will be entering to a new stage of our lives when we walk down the aisle in about slightly more than a year from now and it will be the start of a new beginning. 


Let's begin from here!